
I couldn't put it as a Tuesday tutorial.. due to the fact that I am a day late on this one ;)
My apologies!
I am becoming increasingly busy with the costume project that I took on.. my two oldest children are in the musical Way out West in a Dress and I took on the challenges of doing costumes :D Fun stuff!!!
OK.. on to the tutorial!!
Here is the supplies you should have:
~1.5 yards of fabric, mix and match is best.. I suggest 6 fat quarters of different yet coordinating fabrics.
~a mish mash of rick rack, ribbons, lace bias tape.. whatever strikes your fancy really!
~20" of elastic that is at least 1" wide
~Pinking shears or a rotary cutter with a pinking blade
~if using a rotary cutter, you want a rotary mat as well

Got it all??
Good!
Lets get going!
Step one is to measure the waist and length of what you want the finished tutu to have.
My model is a size 5t and we used 20" for the waist and cut our strips at 18" to 20". Keep in mind that when you tie the fabric on and scrunch it together it stretches out the elastic a little bit. That's a good thing.. no elastic is tight up against the skin.. only fabric. Makes for a very comfortable feel, also the different lengths in the fabric strips are great for the finished tut.. gives it a really fun look.


Next step is to cut and sew your elastic closed, to form a circle. You do this by overlapping less that an inch of the elastic.. I already had my elastic sewn so I took another piece to show you what I am talking about.


So your elastic is now ready to go.. set it aside and get to cutting your strips.
The length, again, should be between 18" and 20" and the width is up to you.
It works better if they are at least 1" wide and if you mix it up between 1" and 2" .. it adds funk to the tutu :)
I fold my fabric to cut, turning my 20" long piece of fabric into a 10" long piece


You want to cut at least 60 strips. So that adds up to about 10 strips per fat quarter.
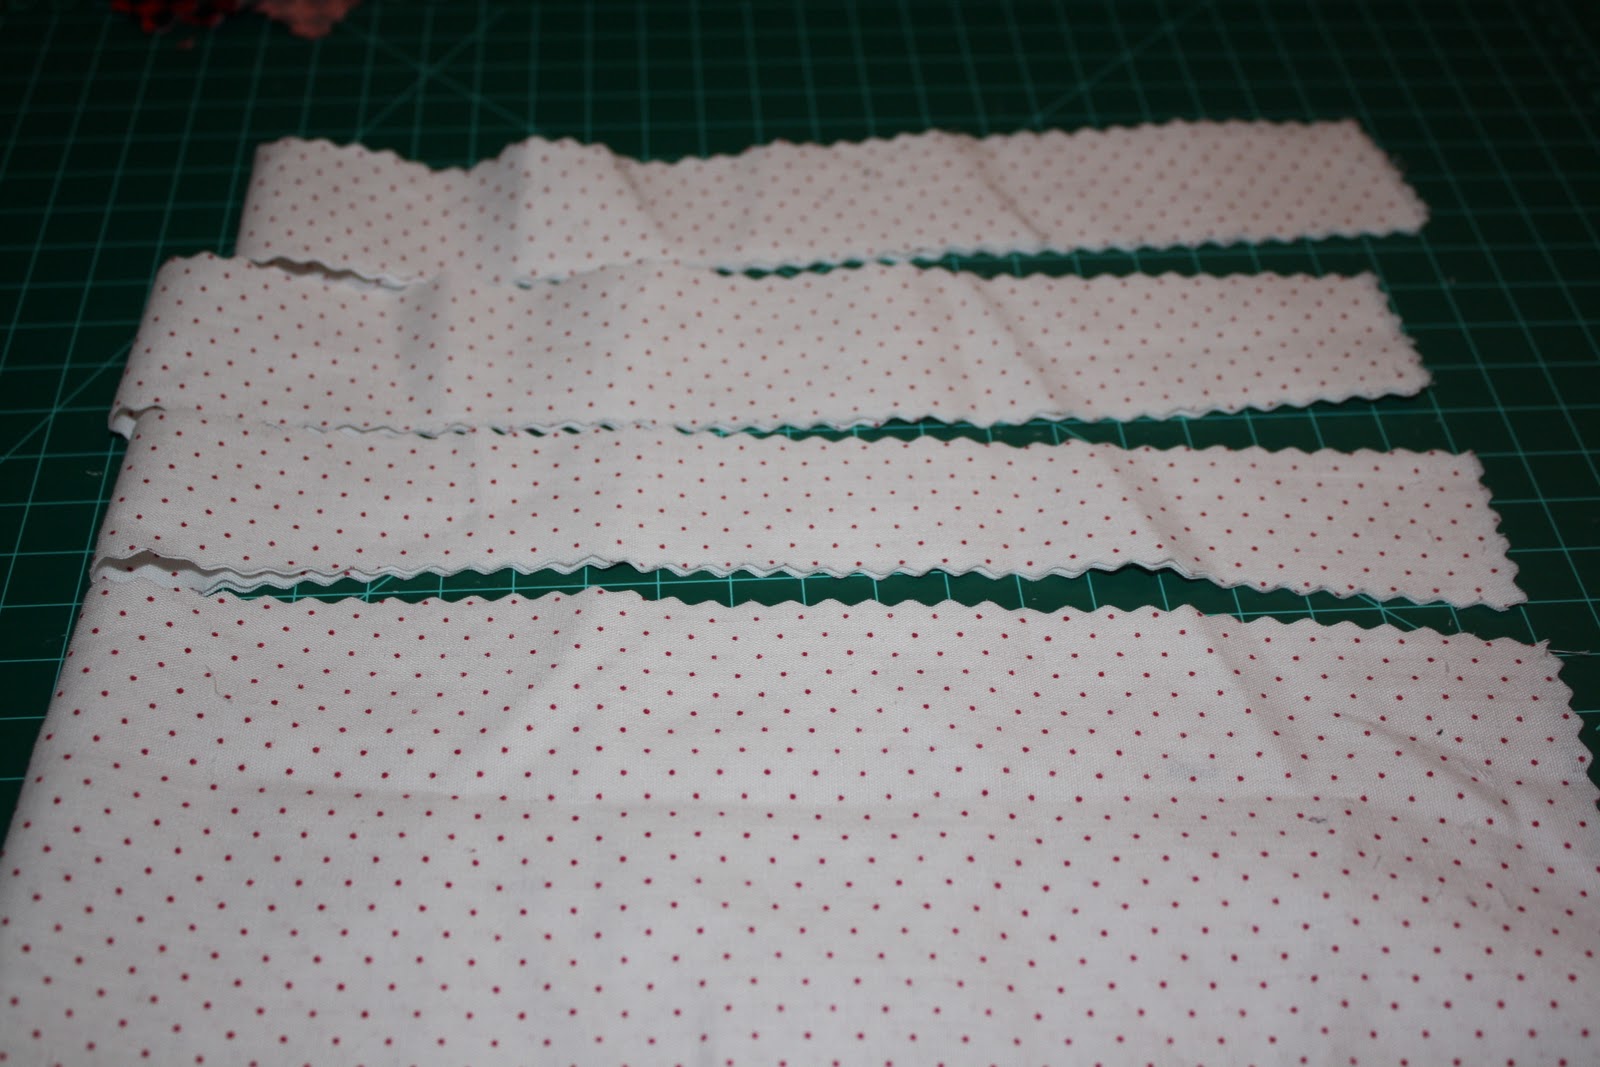
*Note* If you are using regular pinking sheers you will probably only be able to cut through one layer of fabric at a time. No worries :)
So.. go ahead and zip through the rest of your fabric and we can move onto the next step :)
*************** Waiting ;) *****************
Done??
OK, lets keep going...

Cut your rick rack, ribbons or any other fun, funky thing you want to add into the tutu. Cut them at 18" to 20" as well.

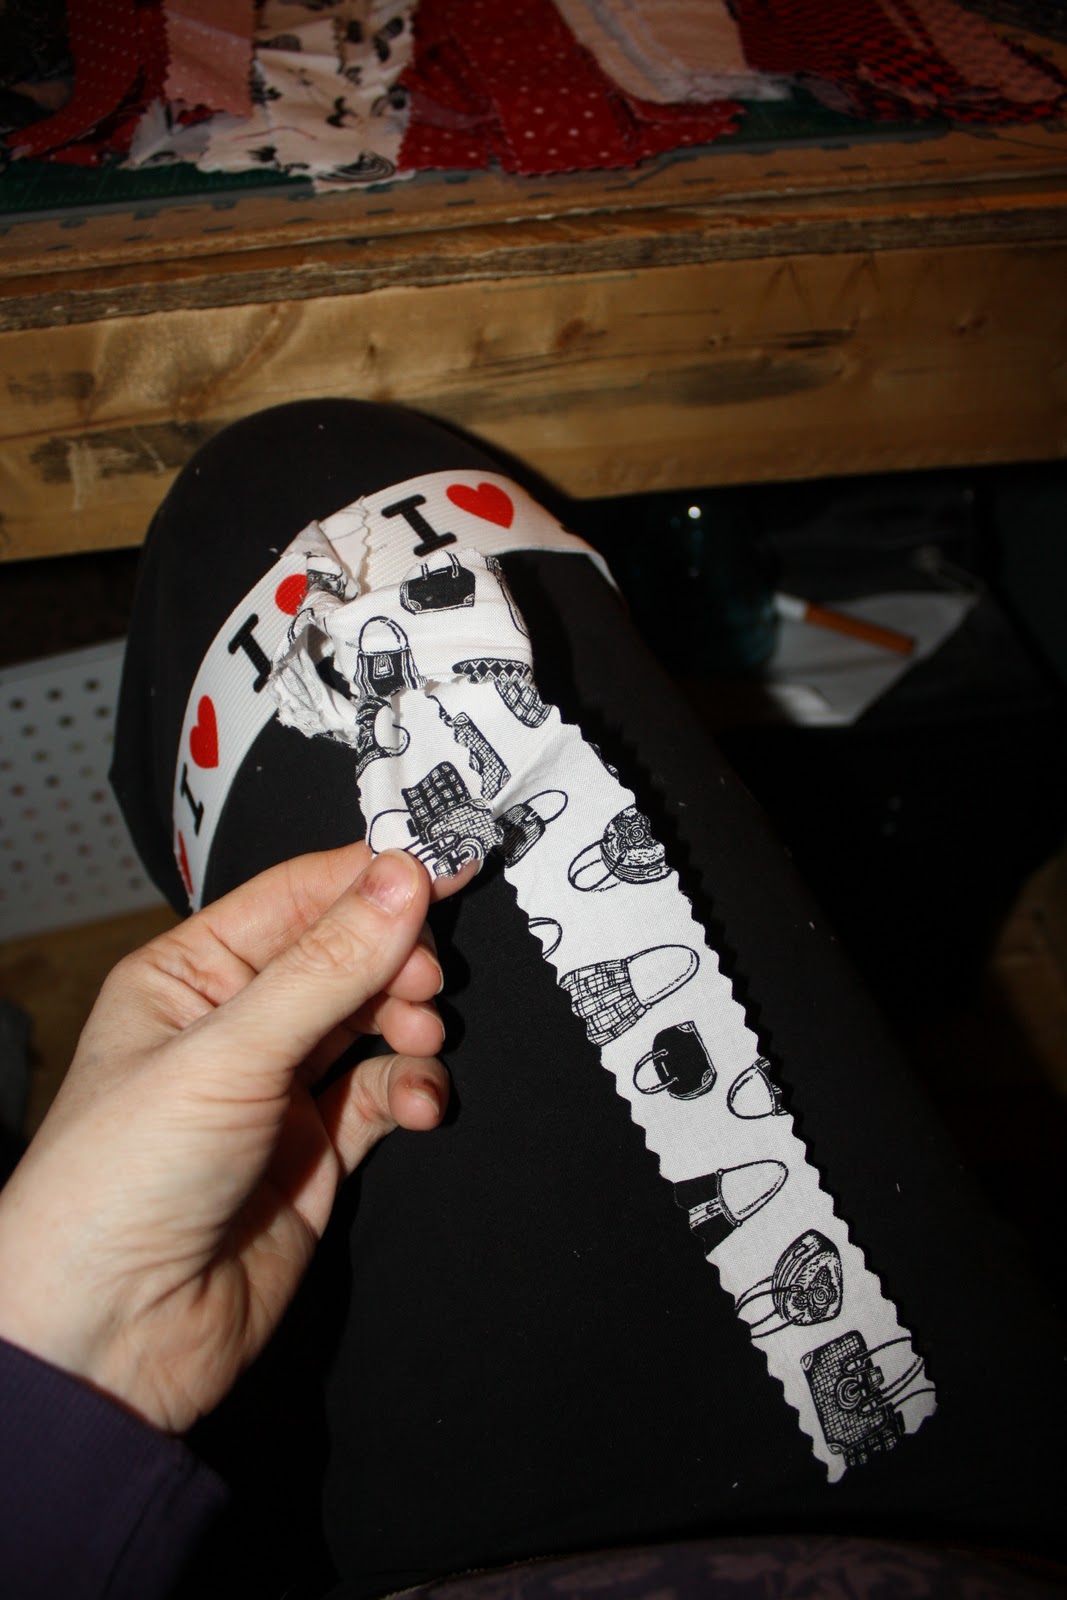
Now we start to tie.
I added step by step pictures of the first strip being tied on. It's really similar to tying a tie (from what I hear). Again.. ask questions if you get confused at all!
Start by sliding the elastic piece onto your thigh. It is the easiest way to get the pieces all tied on if you don't have a child sized dress form like moi... I started like this and moved to my dress form as the tut got more full . I usually tie them all on my thigh when I am sitting in front of the tellie though ;)


Well.. you know the drill.. Ask me if you don't get it ;)
My fingers, in the photo above, are at the top of the loop pushing the fabric down and through it. Grab the end that is going through and pull it tight (below).

Go through the line of fabrics tying each one as I showed you. One you reach the end of the line add a piece of ribbon or rick rack.

I went through the entire line here ^^
Add in the ribbons and rick rack where you see fit.
It takes me about 30 minutes to get the entire tutu tied and in the end.. well.. you have a happy little lady and a fun little do-dad for her to twirl around in.
It takes me about 30 minutes to get the entire tutu tied and in the end.. well.. you have a happy little lady and a fun little do-dad for her to twirl around in.

If you slide the fabrics snug to each other as you tie you get a nice, full look in the end. No elastic is showing, no gaps in the fabric pieces.


No comments:
Post a Comment