We are SeW excited about it and have been working very hard.
This tutorial was a fun and much needed break from my everyday grind, I hope you try it and enjoy it!
For the past year (well.. more than a year but we will be nice and go with year ;) my husband has been working on the remodel of our daughters room
We have 2 little ladies. An 11 year old and a 4 year old.
We are very lucky as they LOVE each other. My older daughter thinks the younger one is "cute" . I am sure that will change.. ha ha ha... we are almost ready to get them both into the finished room.
As creative as
I plan to blog about every step of my decorating of this room.
Starting with the little odds and ends I am making to decorate.
I found a big batch of blank, wooden picture frames at the thrift store. Two batches actually. Once set of 5 from Wal Mart and one set of 6 from Ikea.
They are frames for 4x6 pictures and will look adorable in a cluster on the wall.. except not as boring old wooden frames. I needed to think of a way to jazz them up.
Again.. I started this tutorial as I do my others. Running around my house gathering odds and ends that I can work into my project.
Fun stuff! I always end up finding stuff that makes me think "That's where that went to!"
I ended up with:
~Fabric scraps
~My pinking shears
~Mod Podge
~a frame.. of course.. and
~A brush to apply the Mod Podge
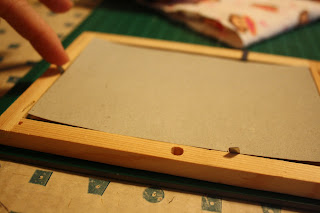
Turn the frame over and lift the little prongs to remove the cardboard and glass
Take your fabric scraps and cut them into smaller shapes. I like to use oblong pieces that resemble triangles and rectangles. All pieces are under 2" in size. Any larger and they become hard to work with.
Apply a liberal amount of Mod Podge to the front of the frame. I use a good amount to get the fabric nice and soggy so I can manipulate it onto the frame better.
You want to fit the fabric pieces all on without making it too bulky. You want to cover all of the wood with minimal overlapping. That way.. when you are done.. the glass and picture all fit in the frame again in the end.
After you fit your first piece on you add more of the mod podge to the top. Enough to create a milky like appearance to the fabric.
Mod podge dries clear and relatively quick. By the time I got all the way amount the frame I was able to hold where I started. It was dry pretty quick.Keep on piecing and piecing all the way around the frame. Be sure to get the inner lip and the outer edge.
More pieceing...
Sooner or later you get ell the pieces perfectly in place and will have somthing similar to this (above)
Being that it dries quickly.. you can now take a 10 minute break..
I had to add an extra step in here..
I am pretty sure I *always* add an extra step.. Sorry.. lol.
I LOVE love love Tulip brands Diamond fabric paint. It is perfect for glittering over dried mod podge.
I used it to add sparkle to my frame too :)
I used a liberal amount of this also.
Apply from tube directly to the frame and spread with a brush.. try to be even and apply everywhere. This stuff should also make the fabric appear milky but will dry clear and very sparkly.
Add an adorable picture and you are GooD tO gO!
Hope you will try it!!


Yeah...It looks so cool! Thank you for another wonderful lesson :)
ReplyDeleteVery Cute! I have made frames like this with other materials, but never fabric. I've got to try it :)
ReplyDelete